How to Replace Cells in an Electric Scooter Battery: a Practical DIY Guide
Practical DIY guide for people whose e-scooter battery has lost range, shuts down under load, or needs 18650/21700 cell replacement.
Practical DIY guide for people whose e-scooter battery has lost range, shuts down under load, or needs 18650/21700 cell replacement.

24 May 2026
How to Replace Cells in an Electric Scooter Battery: a Practical DIY Guide
Your range has dropped by half. The scooter switches off at 30% battery. A new OEM battery can cost a lot, and a repair shop may charge almost as much as the pack is worth. The cells themselves, if you buy proper Grade A 18650 or 21700 lithium-ion cells, are often the cheapest part of the job.
But “possible” does not mean “for everyone”. This guide explains what cell replacement really involves, which tools are mandatory, how to do the job step by step, and when it is smarter to hand the battery to a professional repair service.
Models where the logic is similar: Xiaomi M365 / M365 Pro / M365 1S, Ninebot ES2 / ES4, KugooKirin G1 / G2 and most 36 V or 48 V Chinese e-scooter clones. The voltage and layout may differ, but the cell replacement method is the same.
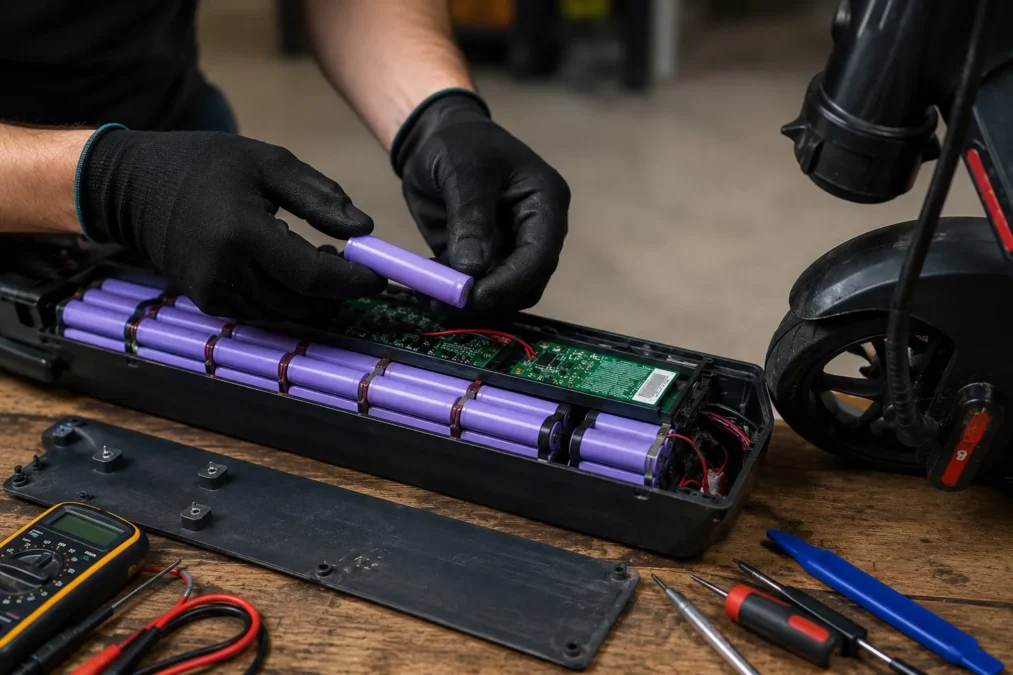
What is inside an electric scooter battery?
An electric scooter battery is a pack of cylindrical lithium-ion cells, usually 18650 cells (18 mm diameter, 65 mm length) or newer 21700 cells (21 x 70 mm). They look a little like large AA batteries. Inside the battery case, dozens of these cells are connected with nickel strip using spot welding.
Cells are connected in two ways:
- Series connection (S) increases voltage: 10 cells in series gives a 36 V pack, 13S gives 48 V, 14S gives 52 V.
- Parallel connection (P) increases capacity: 2P means two parallel cells per group, 3P means three.
A typical 36 V Xiaomi M365 battery is usually 10S2P (20 cells) or 10S3P (30 cells). Many 48 V scooters use 13S2P or 13S3P packs built from 18650 or 21700 cells.
The pack also has a BMS (Battery Management System). This small electronics board protects the cells from overcharge, over-discharge and overheating. It also balances cell groups during charging. After a full cell replacement, the BMS usually does not need programming; it works from voltage readings and recalibrates through the first full charge cycle.
Cost: DIY vs repair service vs new battery
This is the real question behind most searches for “electric scooter battery repair”. Here is the honest comparison.
| Option | Cells | Tools, one-time | Labour / service | Total |
|---|---|---|---|---|
| DIY full rebuild (for example 10S3P, 30 x Samsung 30Q) | about EUR 35–60 | about EUR 35–115 | – | about EUR 70–175* |
| Repair service rebuild | included | – | about EUR 80–160 | depends on pack |
| New OEM battery | included | – | – | often EUR 140–280+ |
After the first repair, tool cost is zero. If you only rebuild one pack, DIY may not save much. If you repair several scooters or an expensive battery, a spot welder pays for itself quickly.
When DIY makes financial sense: at least 2–3 battery packs, or an OEM battery worth enough that the saving is obvious even on the first rebuild.
How to tell if the cells need replacing
Not every battery problem is caused by worn cells. Before opening the pack, rule out simpler faults.
Symptoms that point to worn or damaged cells:
- Range has dropped by 40–60% over recent months despite normal use.
- The scooter shuts down “half charged”, for example at 35%, because the BMS sees voltage sag under load.
- Charging to full takes unusually little time, for example 45 minutes instead of 3 hours.
- The battery gets warm after a short charge or light ride.
Symptoms that may point to a damaged BMS instead of bad cells:
- The battery does not charge at all even though the charger works.
- Power cuts off suddenly at a normal state of charge.
- The scooter does not turn on although the battery has voltage.
Stop and use a specialist if:
- The battery case is swollen or deformed.
- You smell a sweet chemical odour from the pack.
- The battery was crushed, dropped hard or mechanically damaged.
Who should attempt e-scooter battery cell replacement?
This job is for someone who:
- Knows how to use a multimeter for DC voltage measurement.
- Has, or is willing to buy, a spot welder.
- Works patiently around electronics and does not rush.
- Can test cells or at least measure group voltages carefully.
It is not for someone who has never used a multimeter, wants a quick fix, or plans to solder directly to lithium-ion cells. Direct soldering is one of the fastest ways to damage a cell and create a fire risk.
Estimated time for a first-time repair: 4–8 hours, including measurement, matching, welding and balance checks.
Tools for replacing 18650/21700 cells
Mandatory tools
Spot welder — this is non-negotiable. Do not solder directly to 18650 or 21700 cell terminals. High heat can damage the active material and the cell seal, increasing the risk of thermal runaway. Spot welding takes milliseconds and does not significantly heat the inside of the cell.
Nickel strip — usually 0.15–0.2 mm. Use pure nickel, not nickel-plated steel. For higher-current packs, use 0.2 mm or two layers.
Multimeter — for checking every cell and every series group through the BMS balance connector.
Kapton tape — heat-resistant insulation between cells and groups.
Fishpaper / PVC insulating paper — critical insulation around the positive terminal. A short between the positive terminal and metal case can cause immediate failure.
Safety glasses and gloves — spot welding can throw sparks.
CO2 or powder fire extinguisher — working on charged lithium-ion cells without one nearby is not sensible.
Useful optional tools
- Cell tester / capacity analyser, for example ISDT C4 or iCharger.
- Internal resistance meter, especially if replacing only part of a pack.
- Load resistor for capacity testing under load.
Which cells should you buy for a battery rebuild?
There is no room for false economy here. A scooter battery rebuild should use Grade A cells: genuine, new cells from a known manufacturer, not random laptop pulls or “recovered” cells of unknown history.
Why? Parallel cells equalise through the nickel strip and through their internal resistance. If one cell has much higher IR because it is older, weaker or fake, the other cells push current into it. That causes imbalance, faster degradation and in the worst case a fire.
Popular Grade A cells for scooter battery repair:
| Model | Format | Capacity | Continuous discharge | Typical use |
|---|---|---|---|---|
| Samsung INR18650–30Q | 18650 | 3000 mAh | 15 A | Scooters up to about 500 W, balanced range and power |
| Samsung INR18650–25R | 18650 | 2500 mAh | 20 A | Sportier scooters, higher current draw |
| Samsung INR21700–50E | 21700 | 5000 mAh | 9.8 A | Long range, moderate current |
| Samsung INR21700–50S | 21700 | 5000 mAh | 25 A | Premium range and high power |
Before ordering, check the physical format inside your pack. A 21700 cell is wider and longer than an 18650 cell, so it cannot simply replace 18650 cells without rebuilding the pack layout.
You can buy genuine Samsung lithium-ion cells from evzero.eu. If you want help choosing cells for a specific scooter, the City Lion battery repair service can assess the pack.
How many cells should you buy? The ideal repair is a full rebuild with cells from the same model and batch. If you replace only one parallel group, the new cells must match the old ones in nominal capacity, voltage and internal resistance.
Cell replacement step by step
Step 1: Discharge and diagnose before opening
Discharge the battery to about 30% before disassembly. A full pack stores maximum energy and creates maximum short-circuit risk.
Then measure the BMS balance connector with a multimeter. Read each series group voltage. Healthy groups should usually differ by less than 0.1 V. A group that is 0.3 V or more away from the others is suspicious.
Step 2: Open the case
Most scooter batteries are held together with Philips or Torx screws, sometimes with glue or covers. Take photos of the wiring and connectors before unplugging anything. A phone mounted above the pack can save hours later.
Step 3: Remove heat shrink and insulation
Cut the wrap carefully without touching exposed metal with the knife. Note the pack layout: number of rows, number of columns, BMS wire positions and main power leads.
Step 4: Identify and remove bad cells
Lift the nickel strip at the suspect cell terminal using a thin scraper or electronics spatula. Work on one cell at a time and never let loose nickel touch neighbouring terminals.
Step 5: Prepare new cells
Measure every new cell. New Grade A lithium-ion cells should usually arrive at storage voltage, around 3.6–3.7 V. Cells in one parallel group should differ by no more than 20 mV (0.02 V).
If you have an IR tester, keep internal resistance within about 5–10 mOhm between cells in the same group. For a full rebuild, bring all cells to the same voltage before welding.
Step 6: Spot weld the nickel strip
Calibrate the spot welder on scrap cells and nickel offcuts first. A good weld on 0.15 mm nickel survives a finger pull and leaves a visible mark. A weak weld is only a dark spot.
Use at least two weld points per terminal, ideally three or four in a row. Pay special attention to the positive terminal: nickel must sit flat and tight.
Step 7: Connect the BMS balance wires
BMS balance wires are usually soldered to the nickel strip, not directly to the cell. This is fine: you are soldering metal to metal, not heating the cell terminal for several seconds.
Step 8: Voltage test and first controlled charge
Before closing the case:
- Measure total pack voltage. It should match the sum of the series groups.
- Connect the charger and watch the pack for the first few minutes.
- After full charge, check balance voltages again. Groups should usually be within 0.05 V.
Step 9: Insulate and close
Wrap the pack with fresh heat shrink or strong insulating tape. Insulate every point where the battery could touch the metal case. Close the housing and do a short, controlled test ride.
Common DIY battery rebuild mistakes
1. Mixing old and new cells without matching parameters
One new Samsung 30Q inside a group of two tired unknown cells can create high equalising currents if voltage and IR differ.
2. Soldering directly to cell terminals
A soldering iron held on a lithium-ion cell terminal for several seconds can damage the seal and chemistry. Use spot welding.
3. Skipping fishpaper on the positive terminal
The raised positive terminal is surrounded by metal that is negative. A nickel strip touching the wrong part can short the cell instantly.
4. Not checking internal resistance
Cells can show the same voltage but have very different IR. In a parallel group, that means uneven workload and faster ageing.
5. Working on a fully charged battery
Discharge to around 30% before opening. A fully charged pack is much less forgiving.
When to use a repair service instead
DIY cell replacement makes sense when you have the tools, time and patience. But use a specialist when:
- The case is ultrasonic-welded and cannot be opened cleanly.
- The BMS is faulty; replacing cells will not fix a dead management board.
- The battery is 6–7 years old and built from unknown low-grade cells.
- You do not have a spot welder and do not plan to buy one.
At City Lion, battery rebuilds use Grade A cells, IR matching and load testing before release.
FAQ
Can I replace only one damaged cell?
Technically yes, but only if you have the same cell model with matching voltage and internal resistance. In an older pack, a full rebuild is usually the better repair.
Does the BMS need programming after cell replacement?
Usually no. The BMS manages voltage and protection in real time. It recalibrates through the first complete charge cycle.
18650 or 21700: which cells are better?
21700 cells usually offer more capacity in the same chemistry, but the pack design decides the format. You cannot replace 18650 with 21700 without redesigning the layout.
How long will new cells last after a rebuild?
Grade A cells from brands such as Samsung, Molicel or Panasonic/Sanyo commonly last 300–500 full cycles to 80% nominal capacity. With sensible charging, that often means 3–5 years.
Are cheap AliExpress cells OK?
No. The lithium-ion cell market is full of fakes. A printed “5000 mAh” label can hide a real capacity closer to 1200 mAh. Buy from verified distributors such as evzero.eu.
Is electric scooter battery cell replacement legal?
Repairing your own equipment is legal. The practical limitation is warranty: opening the battery usually voids the manufacturer warranty.
Need help choosing cells for a specific scooter battery? Contact City Lion or check genuine 18650 and 21700 cells at evzero.eu.
I have been co-creating City Lion since December 2019 and have been involved with electric vehicles since 2013. My mission is to support the development of electromobility, which will help free the world from emissions, pollution, and noise. Feel free to contact me via LinkedIn.